Screen recording on a Mac is quite tricky. You can record your screen easily on Mac using Quicktime Player, but with internal audio, its difficult to record. But after this tutorial you can easily record internal audio or with a microphone, whichever you want. Whether you are creating a tutorial, recording a presentation, or saving a video call.
For all this you also want to record internal audio This guide will walk you through the process of screen recording on a Mac with audio, ensuring you capture both system audio and microphone input effectively. After this guide you don’t need to search again for how to screen record on Mac with audio. this guide will definitely help you in recording screen audio or microphone.
Table of Contents
Understanding the Built in Screen Recording features on Mac
Mac computers come with powerful built in tools that make screen recording a breeze. Two primary methods are using QuickTime Player and screenshot toolbar, available in MacOS Mojave and later. With this inbuilt option you can use audio from a microphone during recording.
First we will understand how to record screen using quicktime player.
Step by step guide
- Open QuickTime Player: Find it in your Applications folder or search for it using Spotlight.
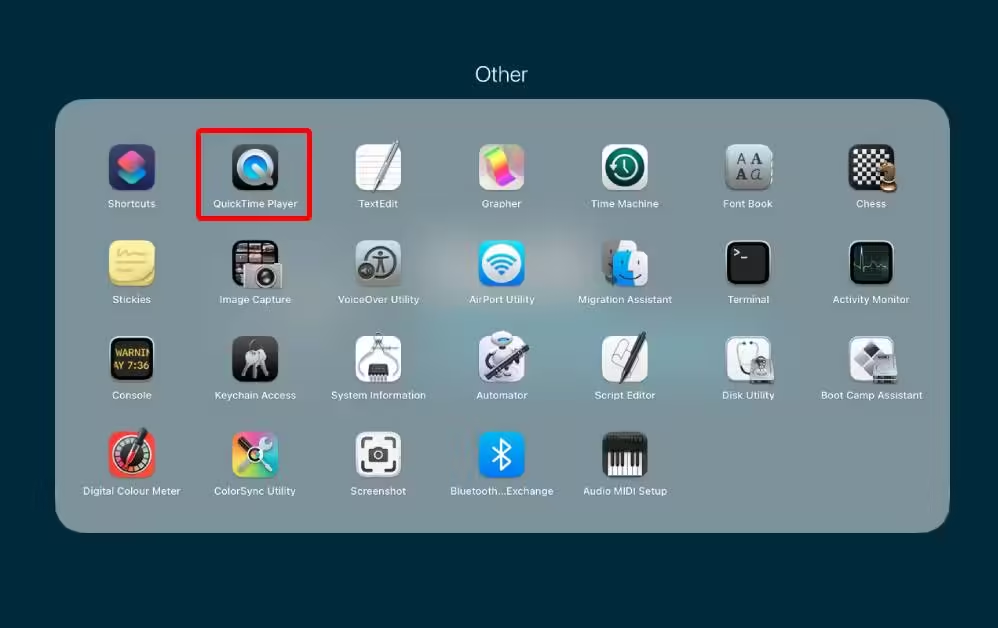
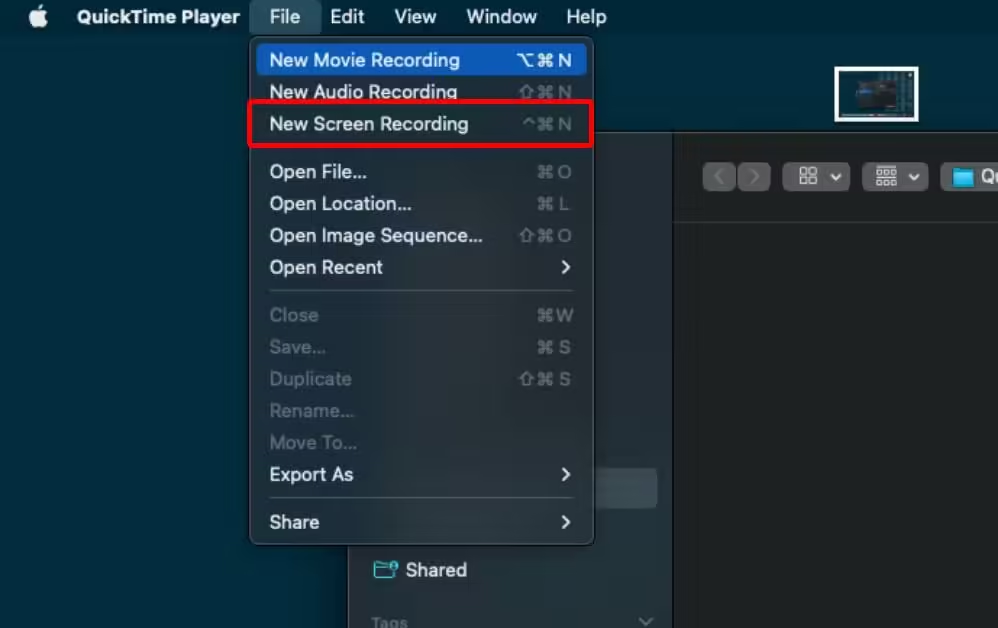
- Start a New Screen Recording: Click on “File” in the menu bar and select “New Screen Recording.”
- Choose Your Recording Options: A small recording window will appear. Click the arrow next to the record button to select your microphone and adjust other settings.
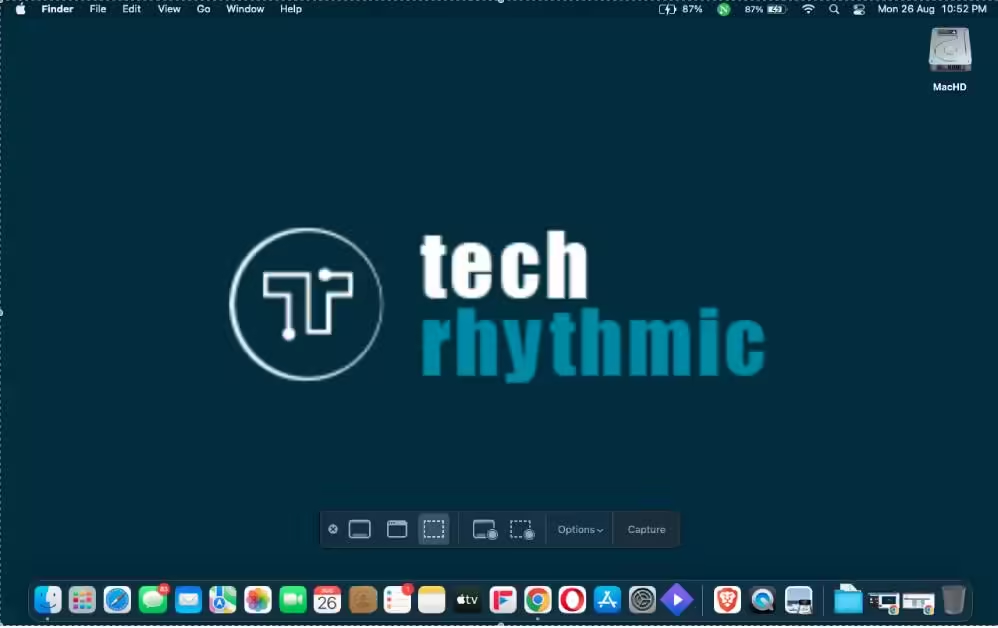
- Begin Recording: Click the red record button. You can choose to record the entire screen or drag to select a specific area.
- Stop Recording: Click the stop button in the menu bar when you’re done.
Enabling Microphone Audio in QuickTime
To ensure your screen recording includes audio, click the drop-down menu next to the record button and select your microphone. This allows QuickTime to capture sound from your environment or narrate the recording.
This is the built-in method for screen recording on your Mac. Now we need to understand how to screen record on Mac with audio.
How to screen record on mac with audio
For Recording Internal audio, we need to setup a third party application.
BlackHole: Audio Loopback Driver
BlackHole is a modern macOS virtual audio loopback driver that allows applications to pass audio to other applications with zero additional latency.
1. Go to this link and download BlackHole: Audio Loopback Driver
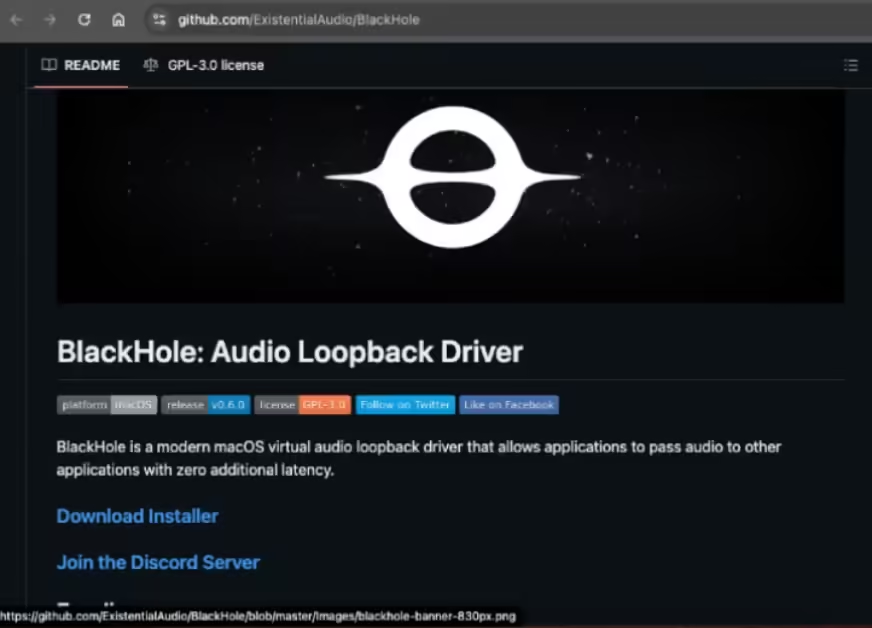
2. Click on Download Installers
3. Donate If you can then enter your Email address and check your mail, you will get download link on your email.
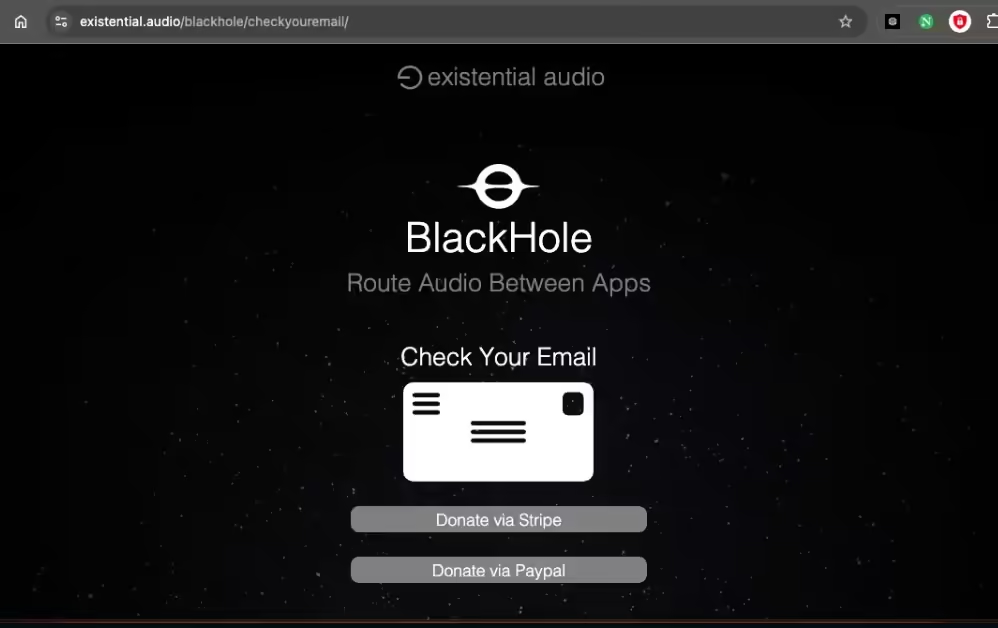
4. Select “blackhole2ch”
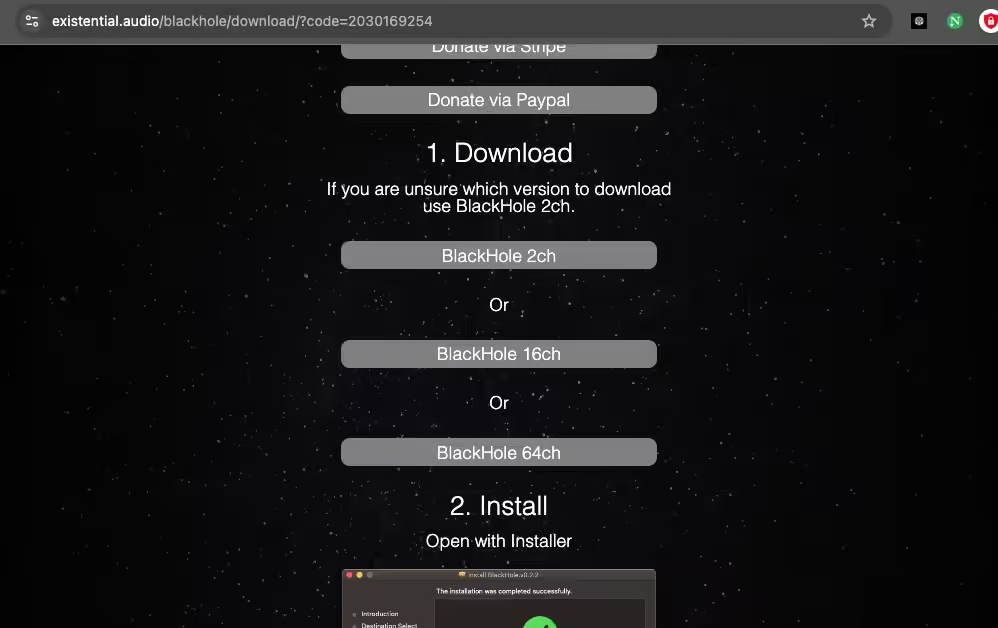
5. Install Blackhole like any other application.
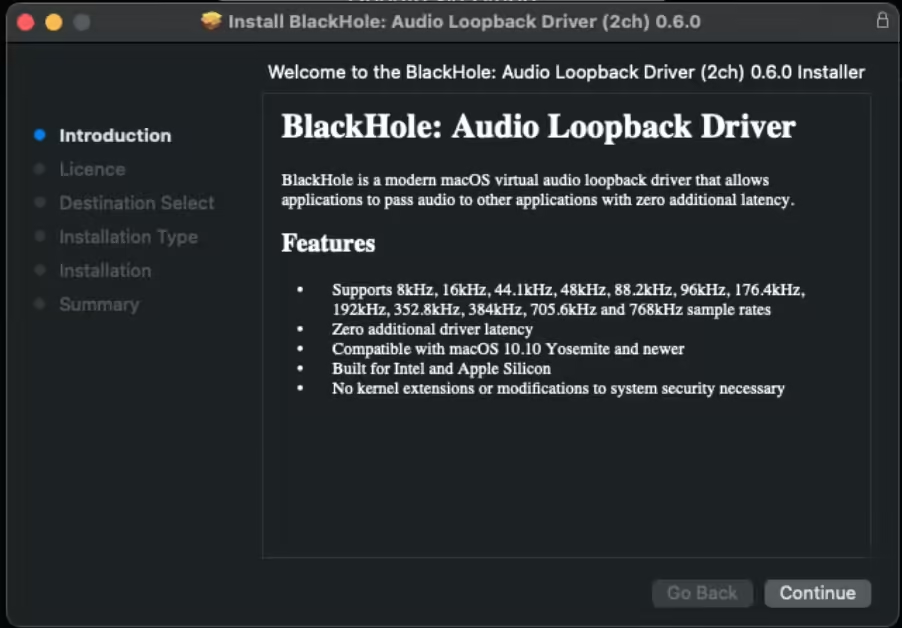
Let’s setup Blackhole for Recording Audio
1. Open Audio Midi Setup
Use Spotlight command+space and type Audio Midi Setup. Click on the Audio Midi Setup app to open.
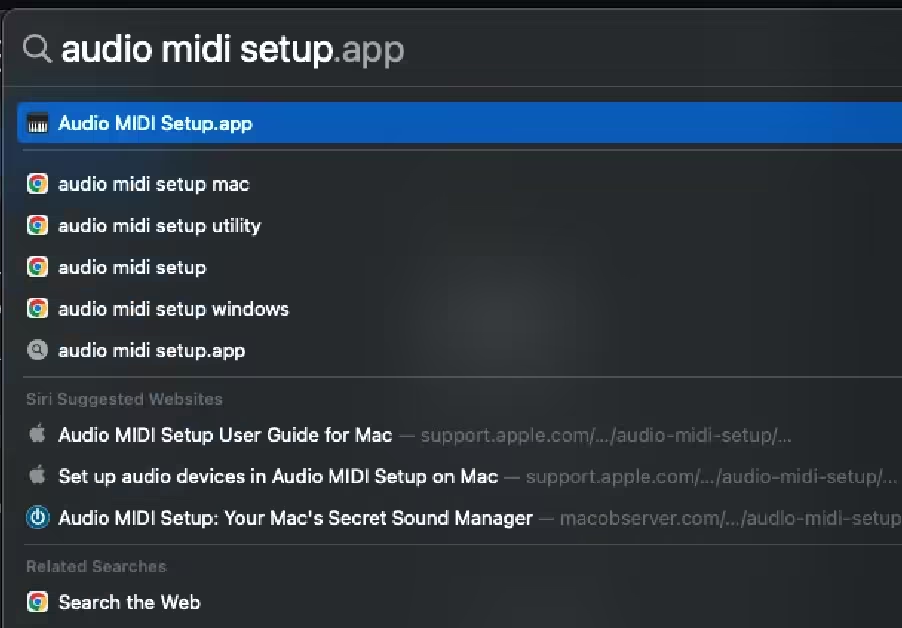
2. Open Audio Devices Window
If the Audio Devices window does not immediately appear when opening Audio MIDI Setup select Audio Devices from the Windows drop down menu in Audio MIDI Setup.
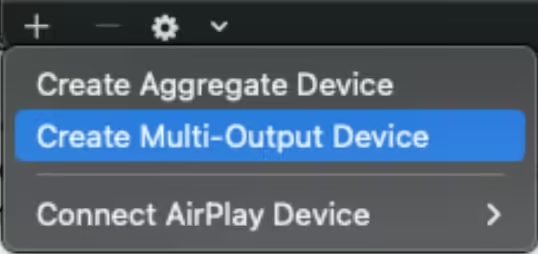
3. Create Multi-Output Device
In the lower left hand corner of the Audio Devices click the + icon. Select Create Multi-Output Device
4. Select Output Devices
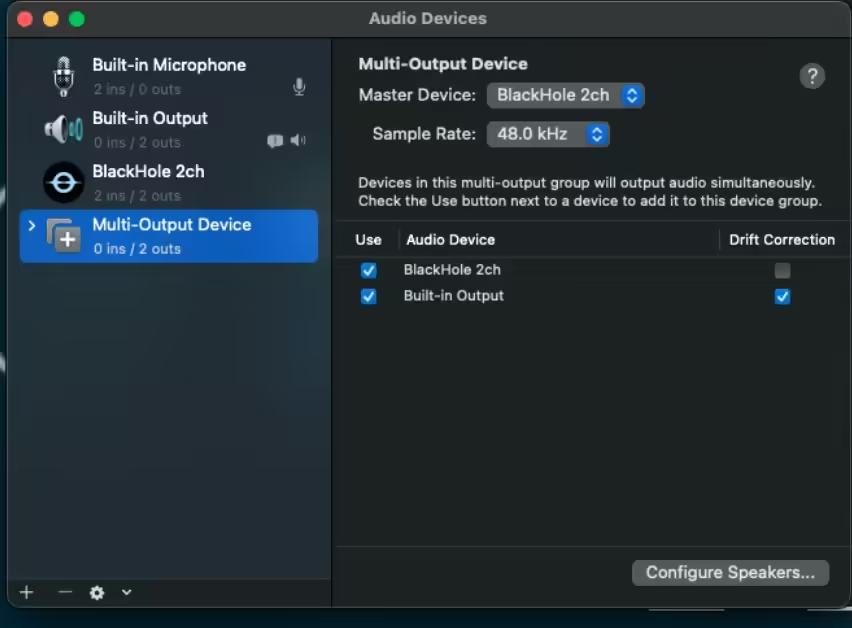
In the new Multi-Output device you just created select the audio devices that you want to output audio. It is highly recommended you enable Drift Correction for all devices except the Clock Source device.
⚠️ IMPORTANT: Due to issues with macOS the Built-in Output (sometimes called MacBook Pro Speakers or similar) or another 2 channel audio device must be enabled and listed as the top device / primary device / clock device in the Multi-Output. If BlackHole is listed first simply uncheck and recheck the box under Use to change the order. This may not be a problem in the latest.
5. Set Audio Output to Multi-Output Device
right-click on your Multi-Output device and select Use This Device For Sound Output. Audio should now be playing through your speakers and through BlackHole.
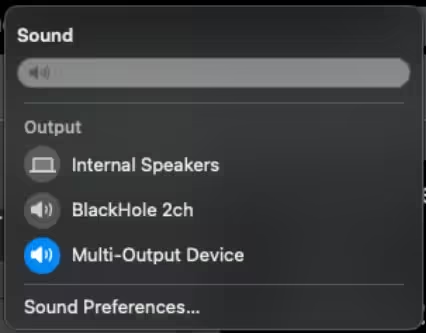
Now you can easily record your internal audio with the help of Blackhole.
How to Screen Record on Mac with Audio using QuickTime Player
1. Press Command + Shift + 5, Now click on Entire Screen
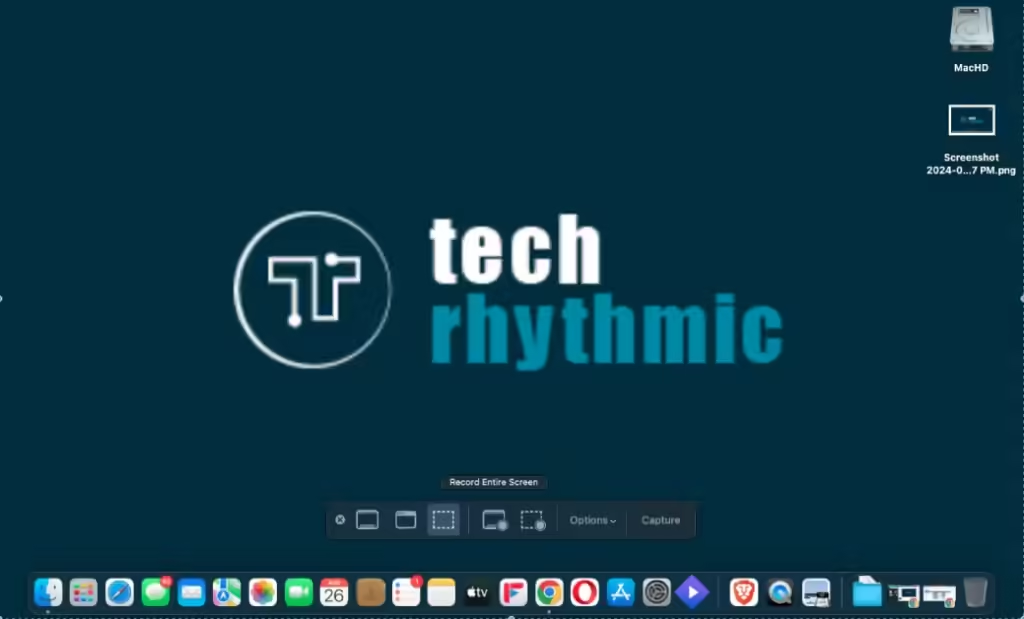
2. Click on Options and select Blackhole
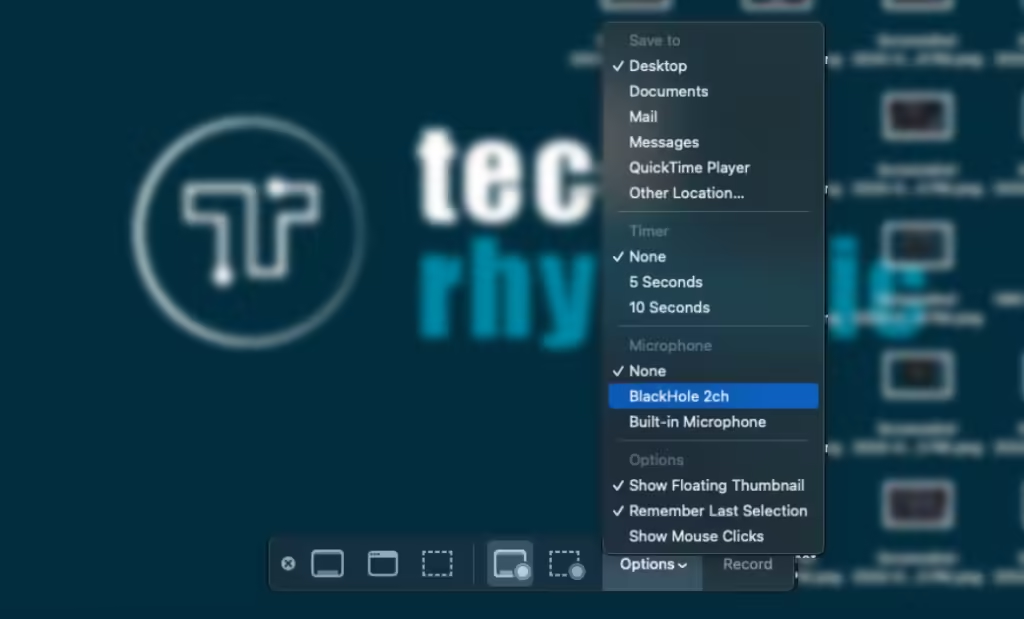
3. Now try to record your screen it will record your internal audio as well.
How To Screen Record On Mac With Audio Using OBS
OBS is one of the best software for streaming and recording, every streamers favorite application for live streaming. Its a open source application you can do many other things with OBS many customization and more, let’s back to the topic how to screen record on mac with audio using OBS.
1. Download OBS using this link.
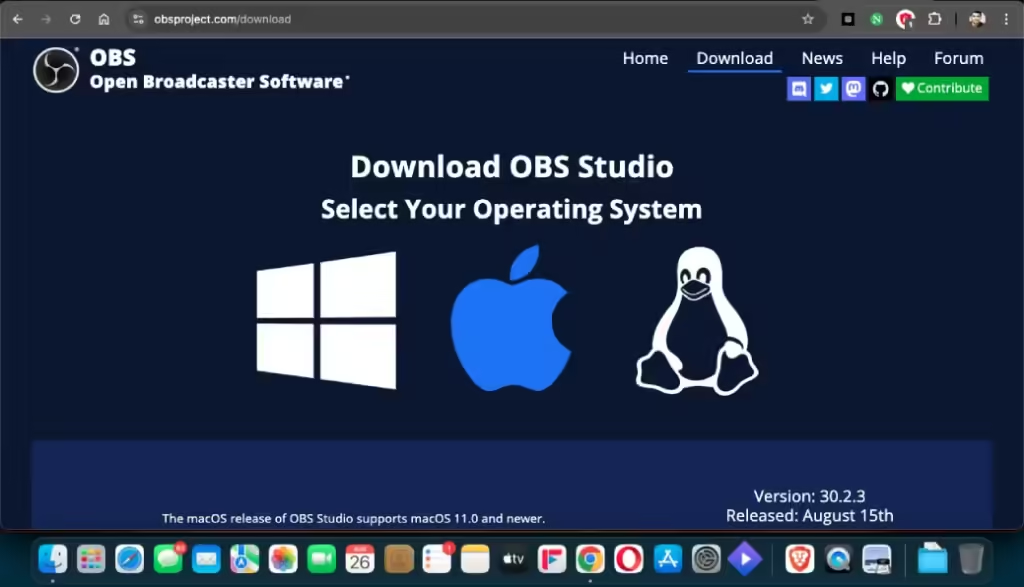
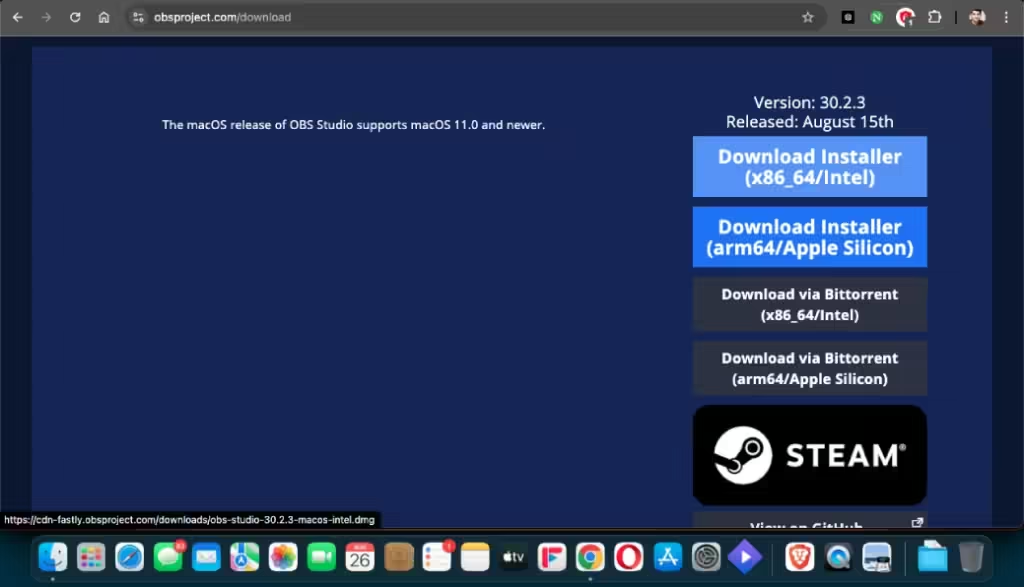
2. Install like other applications.
3. Setup OBS for recording, click on setup
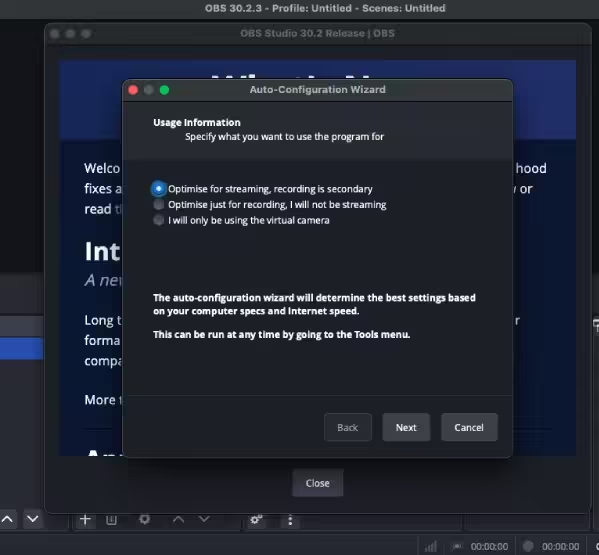
4. Tick on OBS in Security and Privacy.
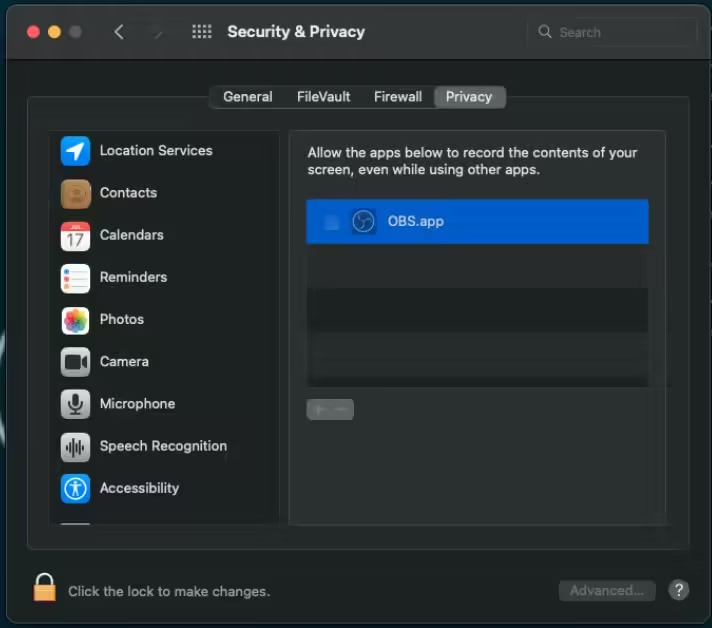
4. After setup you will see this OBS screen
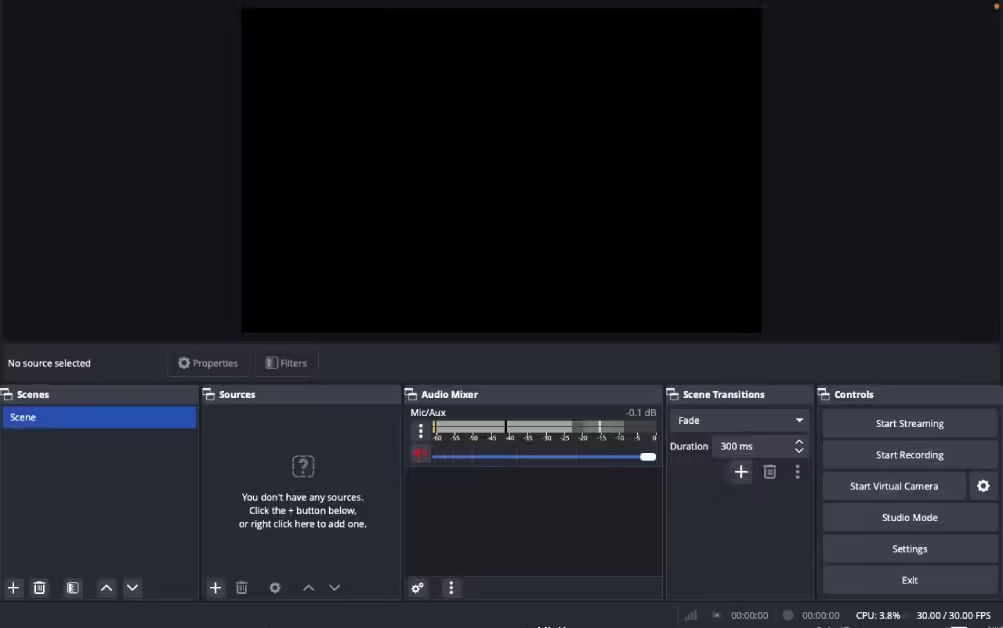
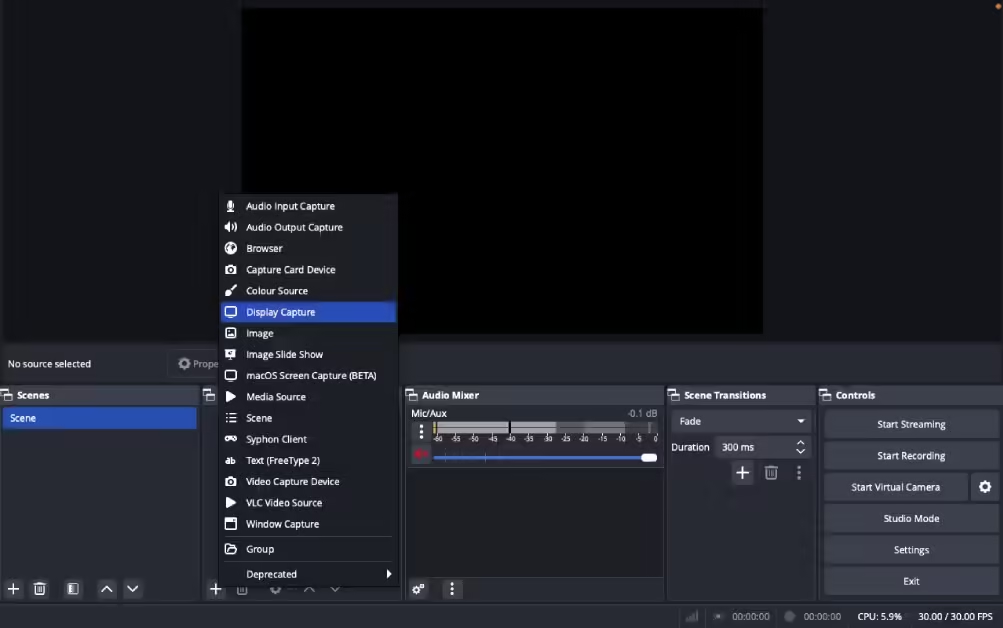
5. Click on Plus icon and select Display or Window Capture, according to your need,
6. Now go to Settings and click on Audio and go to Desktop audio and select Blackhole2ch
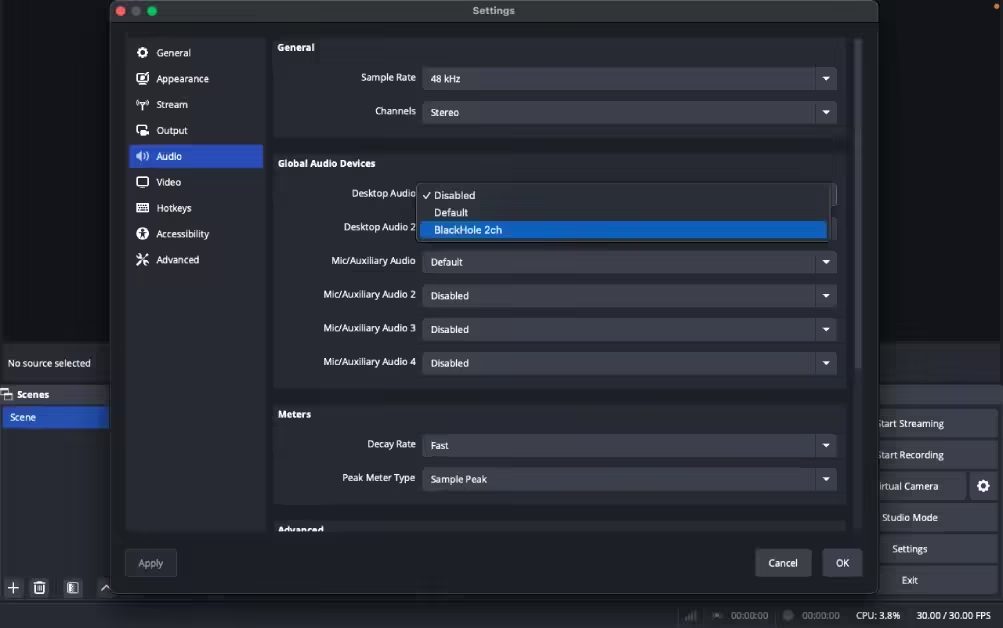
8. Now you can see that there is Desktop Audio spectrum is visible.
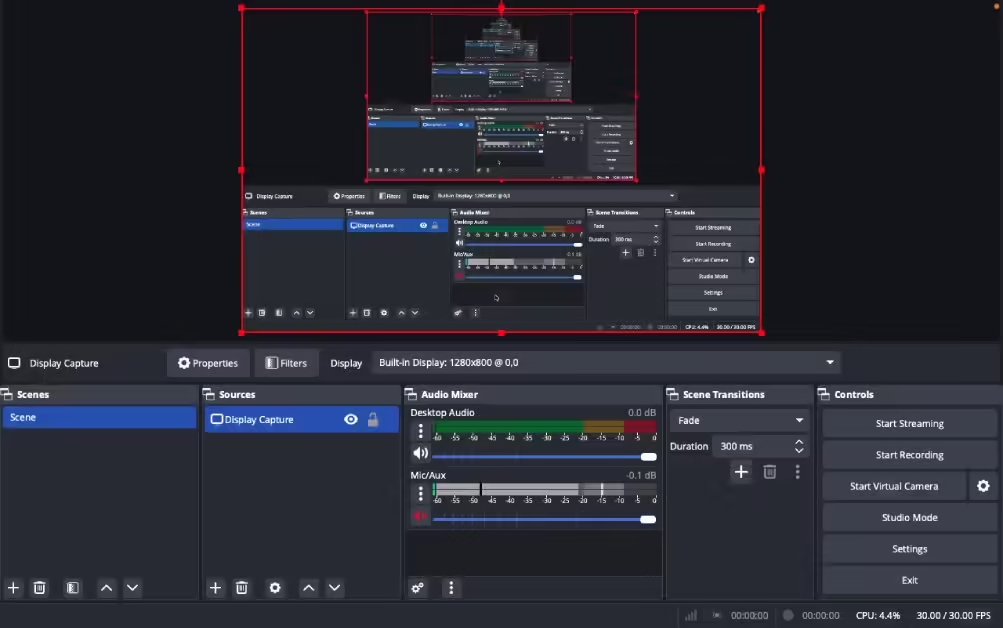
9. Now you can try to record your screen with internal Audio.
Best Practices for Screen Recording on Mac
Preparing Your Mac for a Smooth Recording
- Free Up Disk Space: Ensure ample storage for recording files.
- Update macOS: Keep your system updated for optimal performance.
- Use a Stable Power Source: Prevent interruptions during lengthy recordings.
Ensuring Privacy and Security While Recording
Inform participants if you’re recording a call or meeting. Use privacy settings to block sensitive information on your screen.
Legal Considerations for Screen Recording
Always obtain consent before recording others, especially in professional settings. Be aware of local laws regarding recording conversations and screens.
Conclusion
Screen recording on a Mac with Audio is easier than ever, thanks to the blackhole developers, or built in QuickTime players, as well as OBS also, Whether you’re recording a tutorial, a gameplay session, or a business presentation, these tips will help you capture high-quality video and audio. Now, it’s time to put these techniques into practice and create fantastic screen recordings!
FAQs
1. Can I Record Internal Audio Without External Software?
2. What Is the Best Screen Recording App for Mac?
3. How Do I Edit My Screen Recordings on Mac?
4. Is Screen Recording Legal on Mac?
5. How Do I Improve Audio Quality in My Recordings?
Discover more from Tech Rhythmic
Subscribe to get the latest posts sent to your email.






1 thought on “Mac Screen Recording with Audio: Complete Guide and Tips”