Hey there! Curious about this WSL thing, huh? Maybe you heard the buzz and wanna jump into the Linux world without saying goodbye to your favourite Windows 10. Well, you’ve come to the perfect spot! Let’s break it and help you get started with WSL install Windows 10 machine.
Table of Contents
What is WSL ?
WSL, or Windows Subsystem for Linux, is this cool feature that lets you run a Linux environment right on Windows. No need for dual booting or virtual machines—just pure Linux goodness on your Windows system. It’s like having the best of both worlds, like a techie peanut butter and jelly sandwich.
Why install WSL on Windows 10?
Why not? If you’re into development, data science, or just playing around with different operating systems, WSL gives you access to Linux tools and apps while keeping your Windows workflow intact. It’s like getting a VIP pass to both Windows and Linux parties without changing outfits.
Understanding Windows Subsystem for Linux (WSL)
WSL is basically a compatibility layer that lets you run Linux software directly on Windows. This means you can use your favourite Linux distros and command-line tools on your Windows 10 machine. Pretty cool, right?
Benefits of Using WSL
- Seamless Integration: Run Linux apps alongside your windows apps.
- Developer Freindly: Access a variety of linux tools and libraries.
- Resource Efficient: No need for heavy virtual machines
- Convenience: Easily switch between Windows and Linux Environments
Preparing Your Windows 10 for WSL Installation
Checking System Requirements
Before we are going to start installation process we need to understand our system is ready for WSL or not,
Let’s see WSL requirements
- Windows 10 version 1903 or later
- 64-bit system architecture
- Administrative privileges.- Make sure you are logged in administrator account or you have administrative privileges before going to start WSL install Windows 10.
Updating Windows 10
Now update your windows 10 version to 1903 or higher. Most recent or below 1903 will not support WSL install. Make sure your windows 10 is up to date. So make sure you have installed latest version windows before going to start WSL install windows 10.
Enabling WSL on Windows 10
- Go to Windows and Search Turn Windows Features on off.
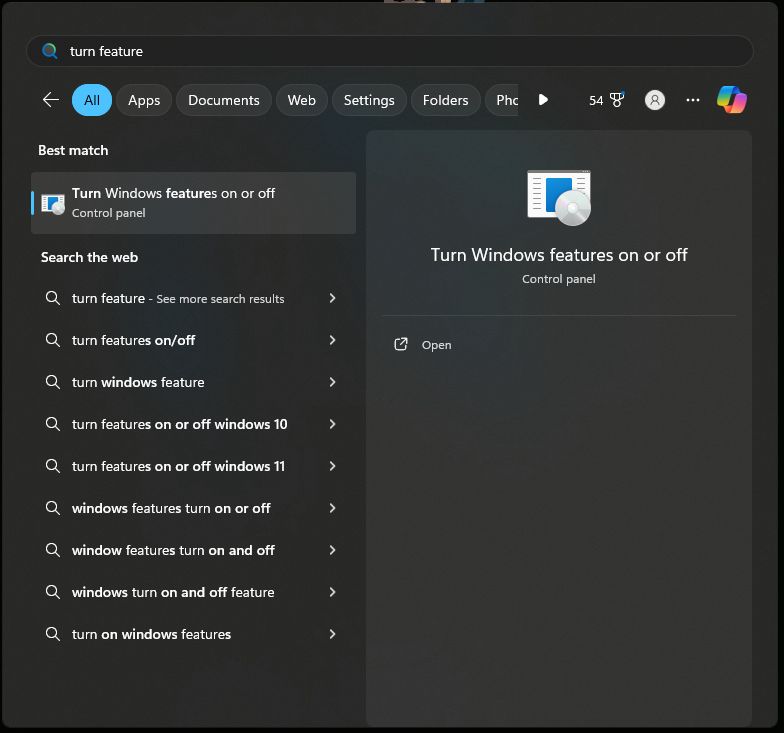
- Select these two features and click to enable “Windows Subsystem for Linux” and “Virtual Machine Platform” Click Ok

- This will search for the required files then click Restart now.

- Your WSL install windows 10.
- Now Open Command Prompt as Admin
- Type this command,
wsl -–list -–online
- Click Enter
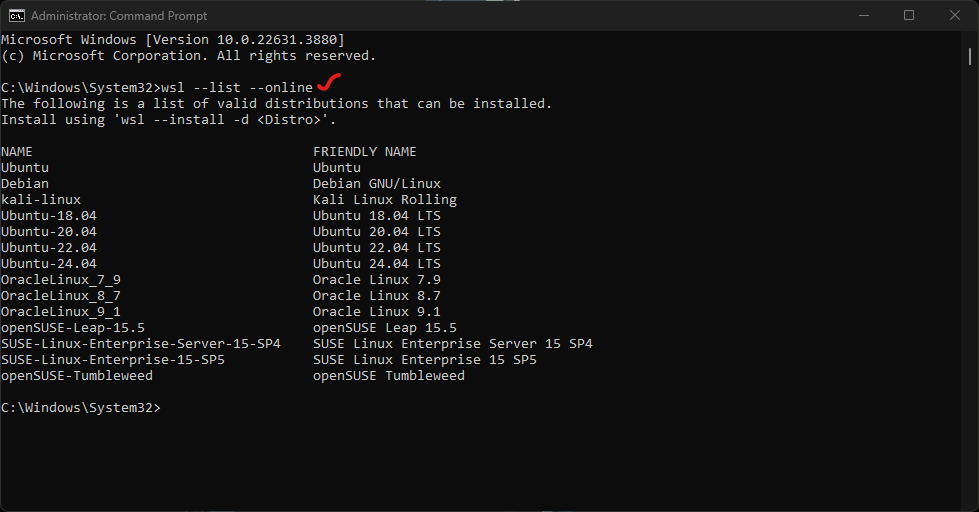
- Now Select your Favourite Linux
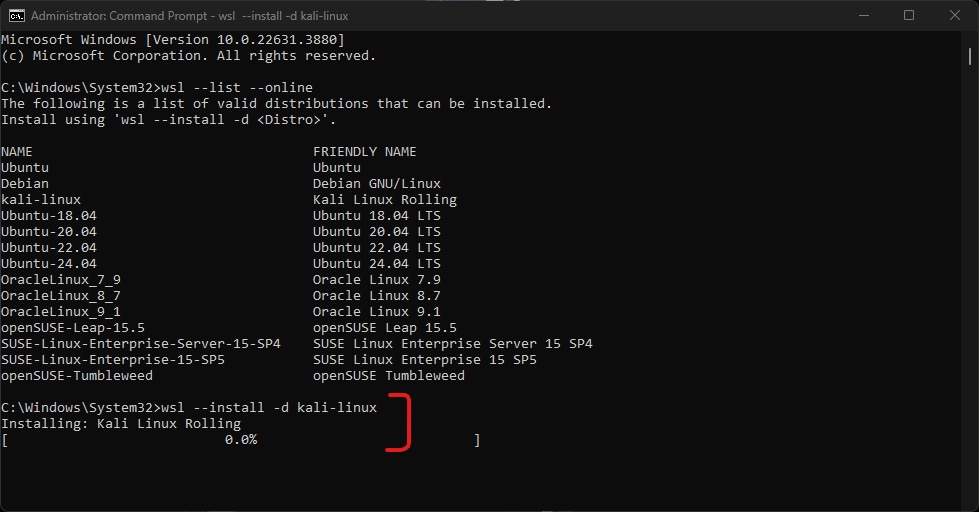
- Type this command
wsl -–install -d <Distroname> (Fill this Distro with your Linux name according to below list)
- I’m going to install Kali Linux so’ my command will look like this,
wsl –install -d kali-linux

- Now you will see on Start Menu Kali Linux app open which will show you the Kali Linux terminal You can use any Kali command on this.
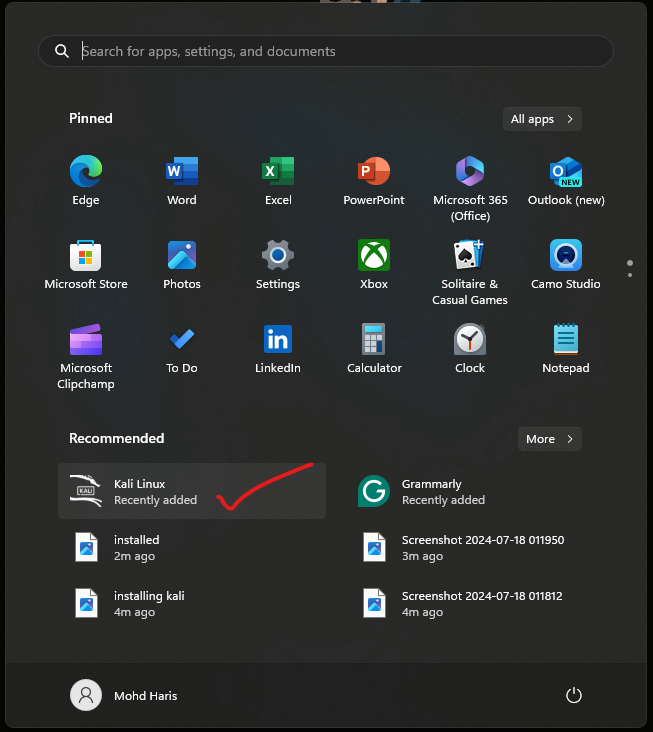
- After opening Kali Linux. If you are getting an error.
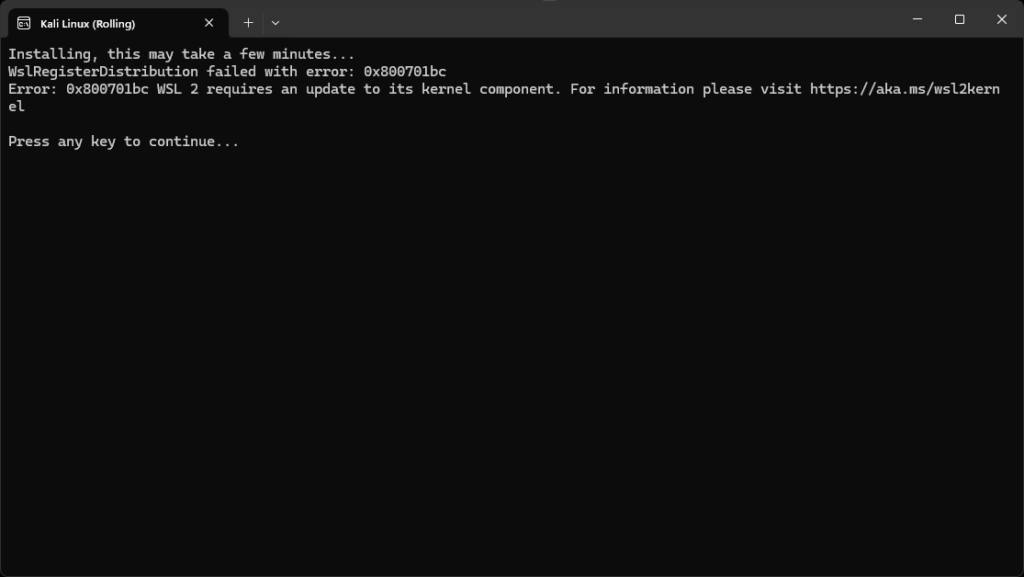
- Go to command prompt and type “wsl.exe –update” and hit Enter.

- Now again open Kali Linux. It will ask you to Enter new UNIX username. Give it a name and password and boom you Kali is ready to rock.
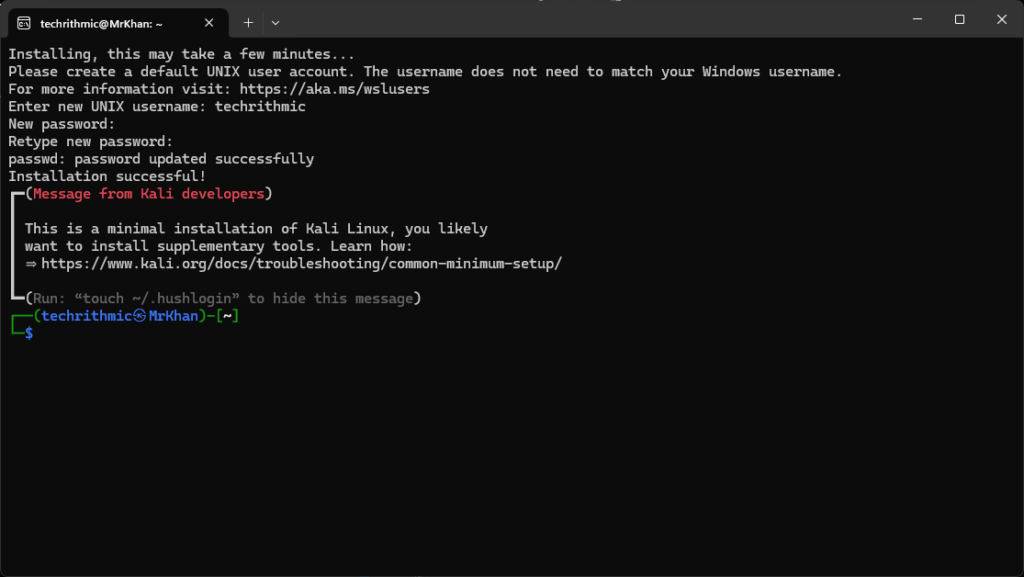
- Now you can use any Kali command in Windows 10. This is how you can use WSL install Windows 10.
- I’ll show you does it working or not, you can type “sudo apt update && sudo apt upgrade”
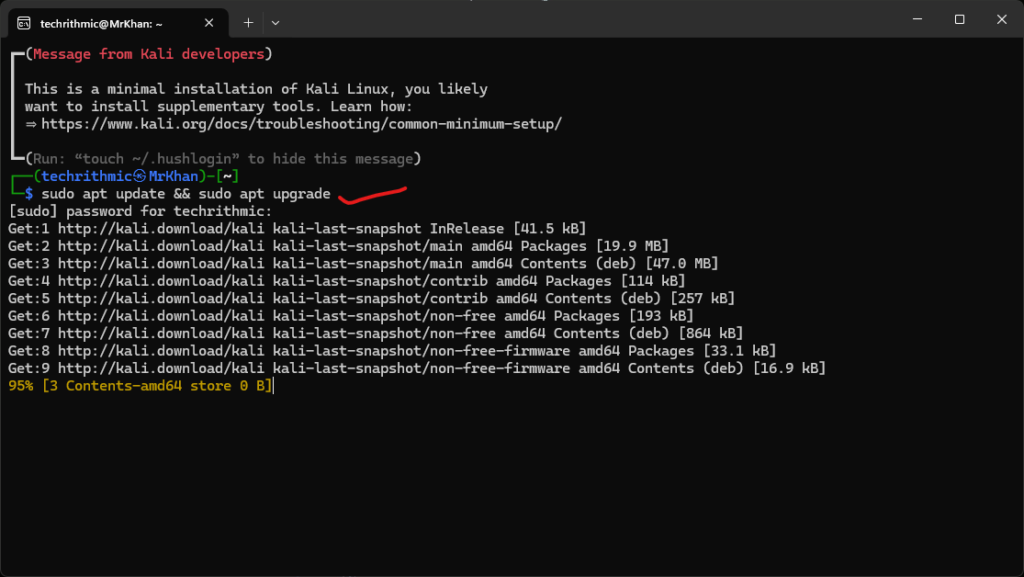
So, This is how you can install any Linux distribution in your Windows operating system without dual boot or virtual machines.
Troubleshooting Common Issues
Installation Problems
If you are having any issues during installation. Check your Windows version Go to settings type about your PC and check if there is an update pending, Sometimes a normal reboot can fix some issues So, restart your system and try again.
Advanced Tips and Tricks
Running GUI Applications
Yes, you can run GUI applications as well on WSL, install an X server on Windows and configure your Linux environment to use it.
Automating Tasks with Scripts
Automate repetitive tasks by writing shell scripts. This can save you a lot of time and effort.
Conclusion
As you have installed WSL on Windows 10, Now you have unlocked a world of possibilities. It’s a fantastic tool for developers , students and tech enthusiasts like us, now explore it and make the most of use this powerful feature. This is how WSL install WIndows 10. There are various methods available, but this one is simple.
FAQs
Q1. Can I run multiple Linux distributions with WSL?
Answer. Of course, You can install and run multiple Linux distros side by side, After WSL is successfully installed you can install other Linux distros from the Microsoft store as well.
Q2. How do I uninstall a Linux distribution from WSL?
Answer. Simple go to apps and features in Windows settings, search your Linux distro, like Kali in my case, select and uninstall.
Q3. Can I use WSL for professional development?
Answer. Yes, Definitely you can use WSL for professional development. Many developers use it in their daily tasks because of its powerful features and flexible nature without dual boot or installing virtual machines.
Q4. What are the limitations of WSL?
Answer. Well WSL is a powerful tool no doubt. But in some cases we might run into issues with certain hardware drivers or kernel modules. But in most cases it’s working fine. At the same time it’s possible maybe you can get this issue.
Discover more from Tech Rhythmic
Subscribe to get the latest posts sent to your email.


2 thoughts on “WSL Install Windows 10: A Step-by-Step Guide”