Always keep an eye on your CPU temperature to make it cool. Extreme heat can degrade our system performance and even affect our hardware. In this article, we will see how to check CPU temperature windows 11.
Table of Contents
Why Frequently Check CPU Temperature?
Before we see how to check CPU temperature Windows 11, first, we will understand why it’s important to always keep an eye on your CPU temperature.
- Overheating can be harmful for your system. It will decrease your system performance, or sometimes it will cause unexpected shutdowns.
- Keeping your system from overheating can extend your hardware life.
- A normal, cool system can perform better than a hot CPU. Keep your system as smooth as possible.
Methods How to Check CPU Temperature Windows 11
1. Using BIOS/UEFI Firmware
The BIOS/UEFI firmware is also software but it’s integrated in your motherboard so you don’t need to download anything. You just need to restart in boot mode to access it.
Steps to follow for the BIOS menu.
- Restart your computer.
- During the boot process, press one of these keys (F2, F10, Delete, or Esc) to enter the BIOS/UEFI setup. The exact key you can check on internet according to your motherboard manufacturer can be searched on internet.
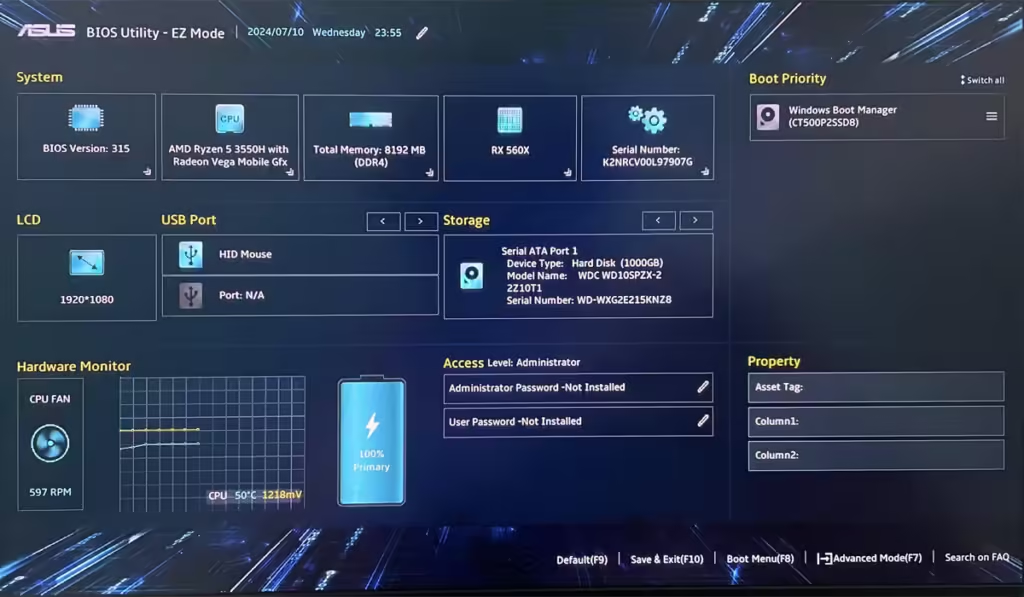
- Once you enter the BIOS/UEFI menu, navigate to the Hardware Monitor, Status, or you can see something similar to this.
- Here, you can see the CPU temperature.
2. Using Windows Task Manager
Task Manager in Windows 11 will not provide direct information for CPU temperature.
It will give us an idea of the CPU load and performance.
Steps to Follow
- Press Ctrl + Shift + Esc and open Task Manager.
- Go to the Performance tab.
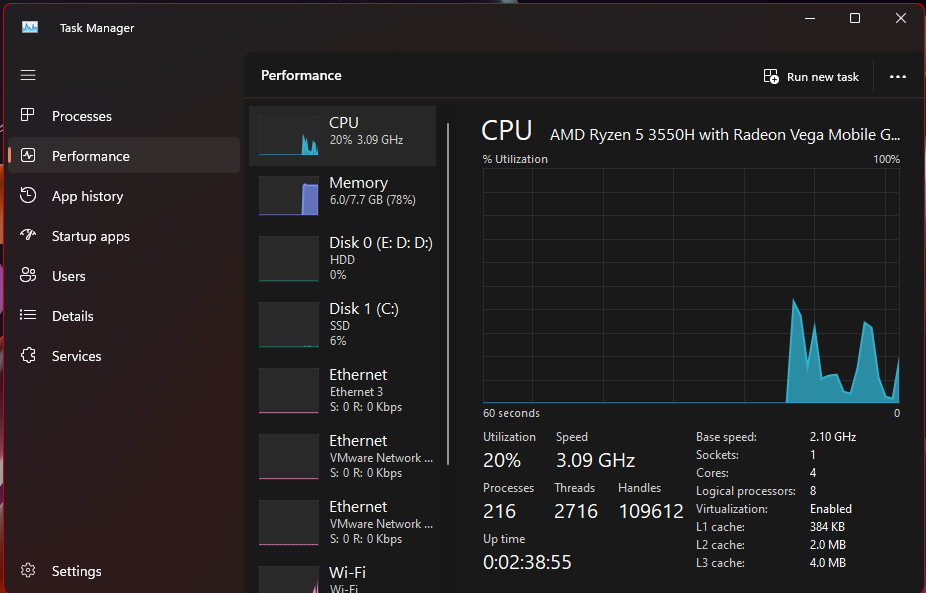
Here, you can see the CPU usage and speed, but not the temperature.
For temperature readings, we need some third-party tools.
3. Using Third-Party Software
There are many third-party applications available on the internet. But we have selected some popular applications for you. So you don’t need to search to see which one is good.
Core Temp
Download Core Temp from its website and install it.
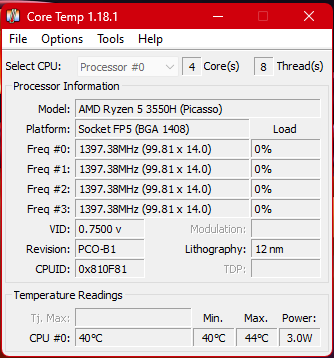
Launch the application to see the real-time CPU temperature.
Core Temp also provides additional details like CPU load, frequency, and power consumption.
HWMonitor
Download and install HWMonitor from website.
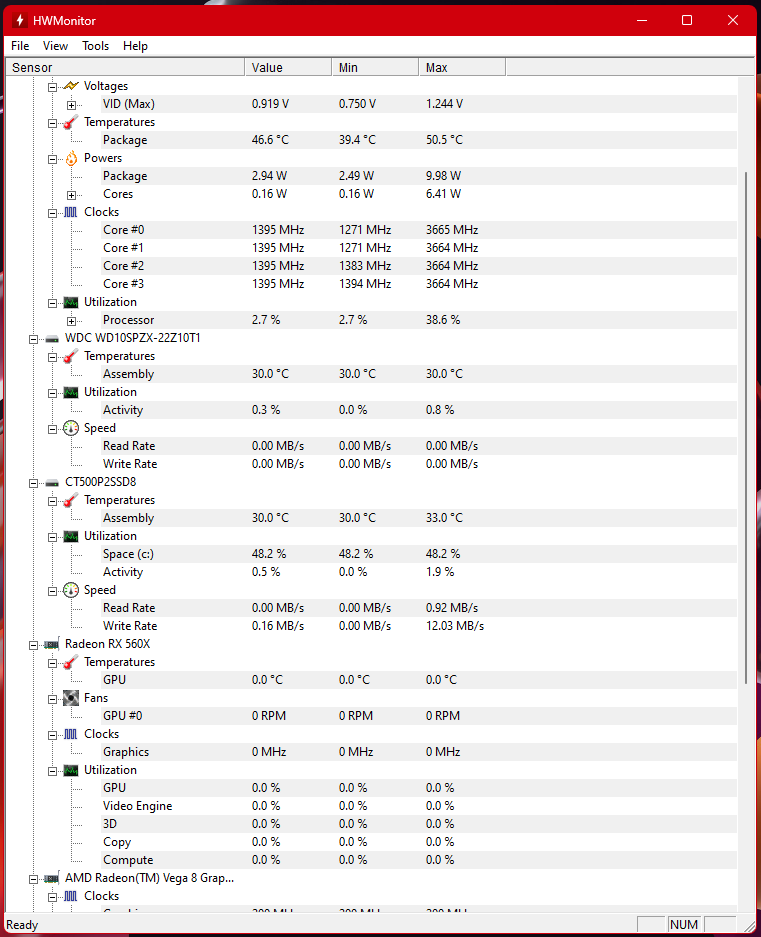
Open HWMonitor to get detailed information about your CPU temperature, and we can also examine other parts temperatures, like GPUs and hard drives.
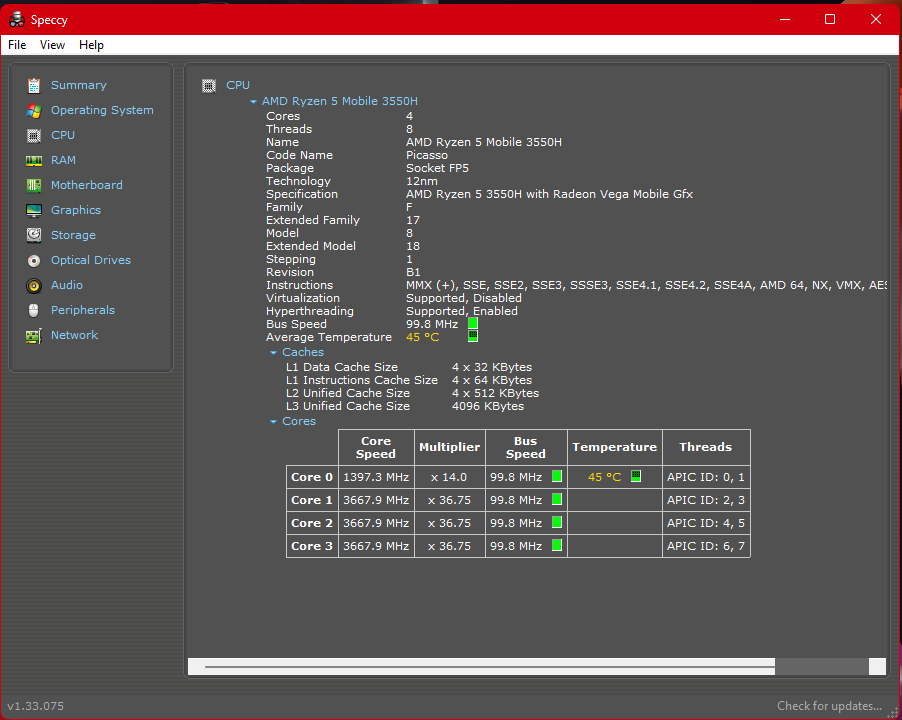
Speccy
Download and install Speccy from website.
Open Speccy it will automatically scan and display the temperatures of our CPU and other components details also.
Tips for Managing CPU Temperature
Now let’s see some tips for managing CPU temperature so that our system will work smoothly.
Follow some of these tips, and you will surely get results from them.
Ensure Proper Ventilation: Make sure your computer case has good airflow. Keep it clean from the dust.
Use Good Quality Thermal Paste: Applying good quality thermal paste between your CPU and its cooler can help improve heat dissipation. If you don’t know how to apply thermal, go to your nearest professional.
Check Your Cooling System: Ensure that your CPU cooler and case fans are working properly.
Upgrading Your Cooler: If you’re using your stock pre-installed cooler, then upgrading to an aftermarket cooler can reduce our system temperatures.
Monitor and Manage Workloads: Avoid running too many heavy applications simultaneously.
Conclusion
Keeping eye on your CPU temperature is good for keeping your computer healthy and running smoothly. well Windows 11 doesn’t offer a built-in tool for this, Go to the BIOS/UEFI firmware or using third-party software for checking CPU temperature are also good methods. Regularly checking and managing your CPU temperature can control overheating issues, increase the life of your hardware, and ensure your system runs smoothly. I hope you don’t need to search further how to check CPU temperature windows 11. I hope you understand all methods.
FAQ on How To Check CPU Temperature in Windows 11
Q1: Why should I check the CPU temperature?
Q2: How can I check the CPU temperature in Windows 11?
Q3: Does the CPU temperature display in Windows Task Manager?
Q4: What are your suggested tools for checking CPU temperature?
Q5: How frequently should I monitor my CPU temperature?
Q6: What should I do if my CPU temperature is too high?
Discover more from Tech Rhythmic
Subscribe to get the latest posts sent to your email.



1 thought on “How To Check CPU Temperature Windows 11”